How to Set Up Usercentrics Advanced Consent Mode in Google Tag Manager
Apr 3, 2025

Proper consent management is critical for compliance with data privacy laws such as GDPR, CCPA, and ePrivacy Directive. Using Usercentrics with Google Tag Manager (GTM) allows you to manage user consent efficiently while optimizing website performance and legal compliance.
By following this step-by-step guide, you will:
- Ensure your website remains compliant with data privacy laws.
- Enable Google Consent Mode for effective tag management.
- Optimize tracking implementation without violating user privacy.
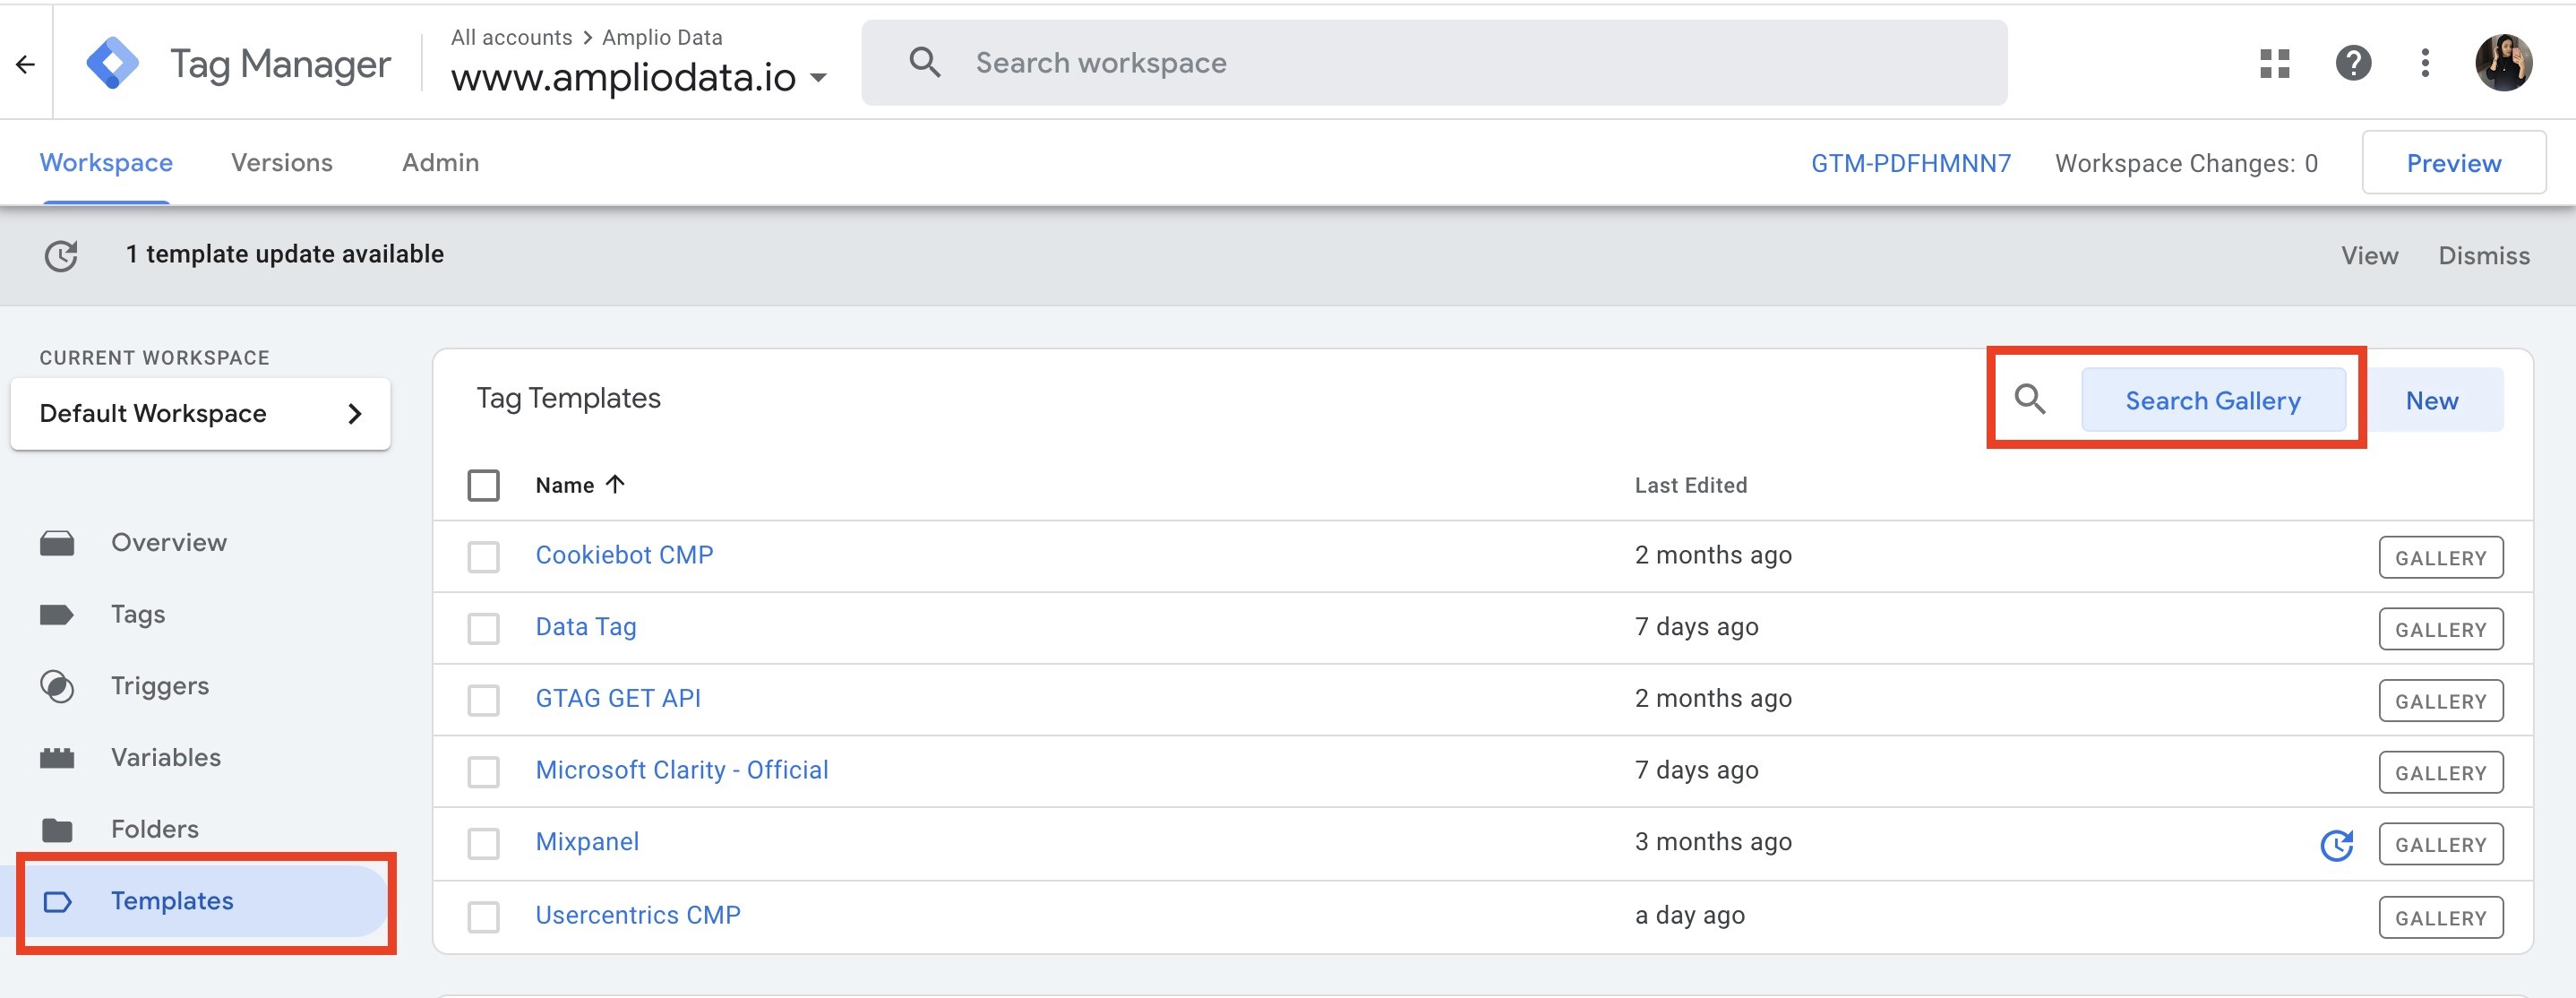
Step 1: Access Google Tag Manager Templates Gallery
Log into your GTM account at Google Tag Manager.
Go to the "Templates" section in the left-side menu.
Click "Search Gallery" to open the community templates repository.
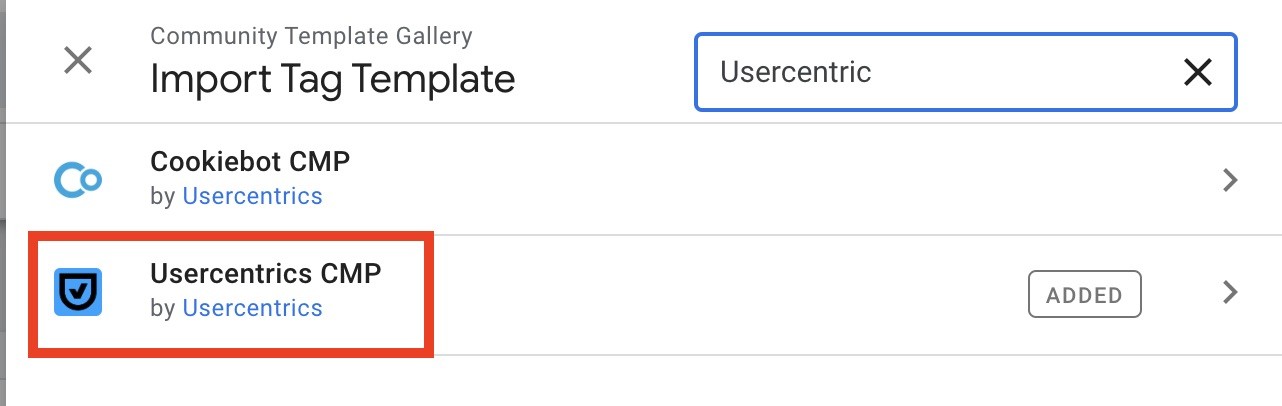
Step 2: Add the Usercentrics CMP Template
In the search bar, type "Usercentrics CMP".
Click on the Usercentrics CMP template from the results.
Select "Add to workspace" to integrate it into your GTM setup.
This step ensures you are using an officially supported Usercentrics template for better compatibility.
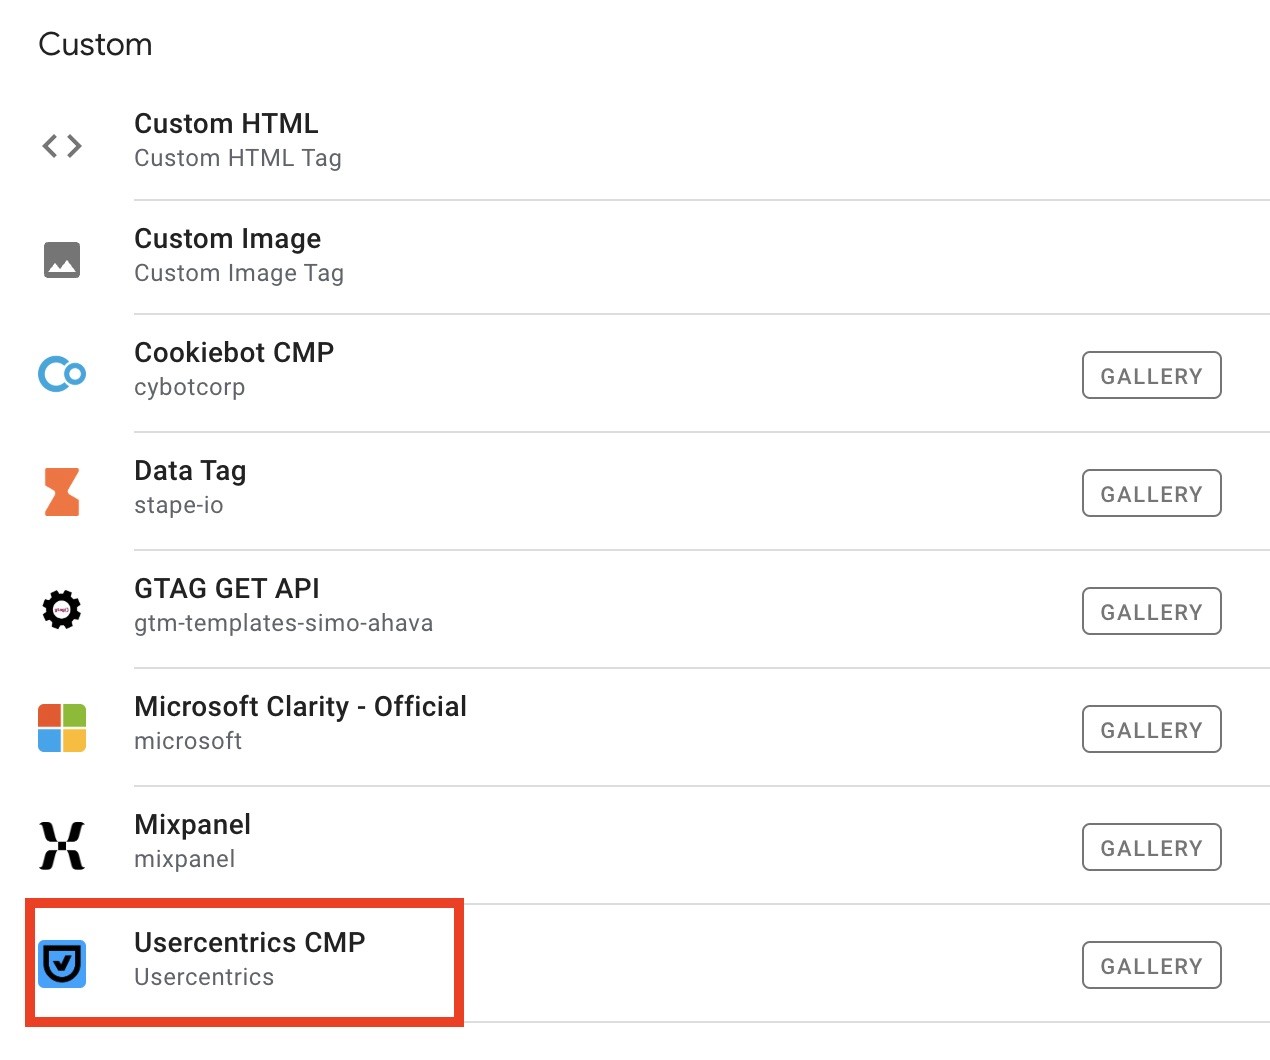
Step 3: Create the Usercentrics CMP Tag
Navigate to "Tags" and click "New" to create a new tag.
Name the tag (e.g., Usercentrics CMP Initialization).
Under Tag Type, select Usercentrics CMP from the custom templates section.
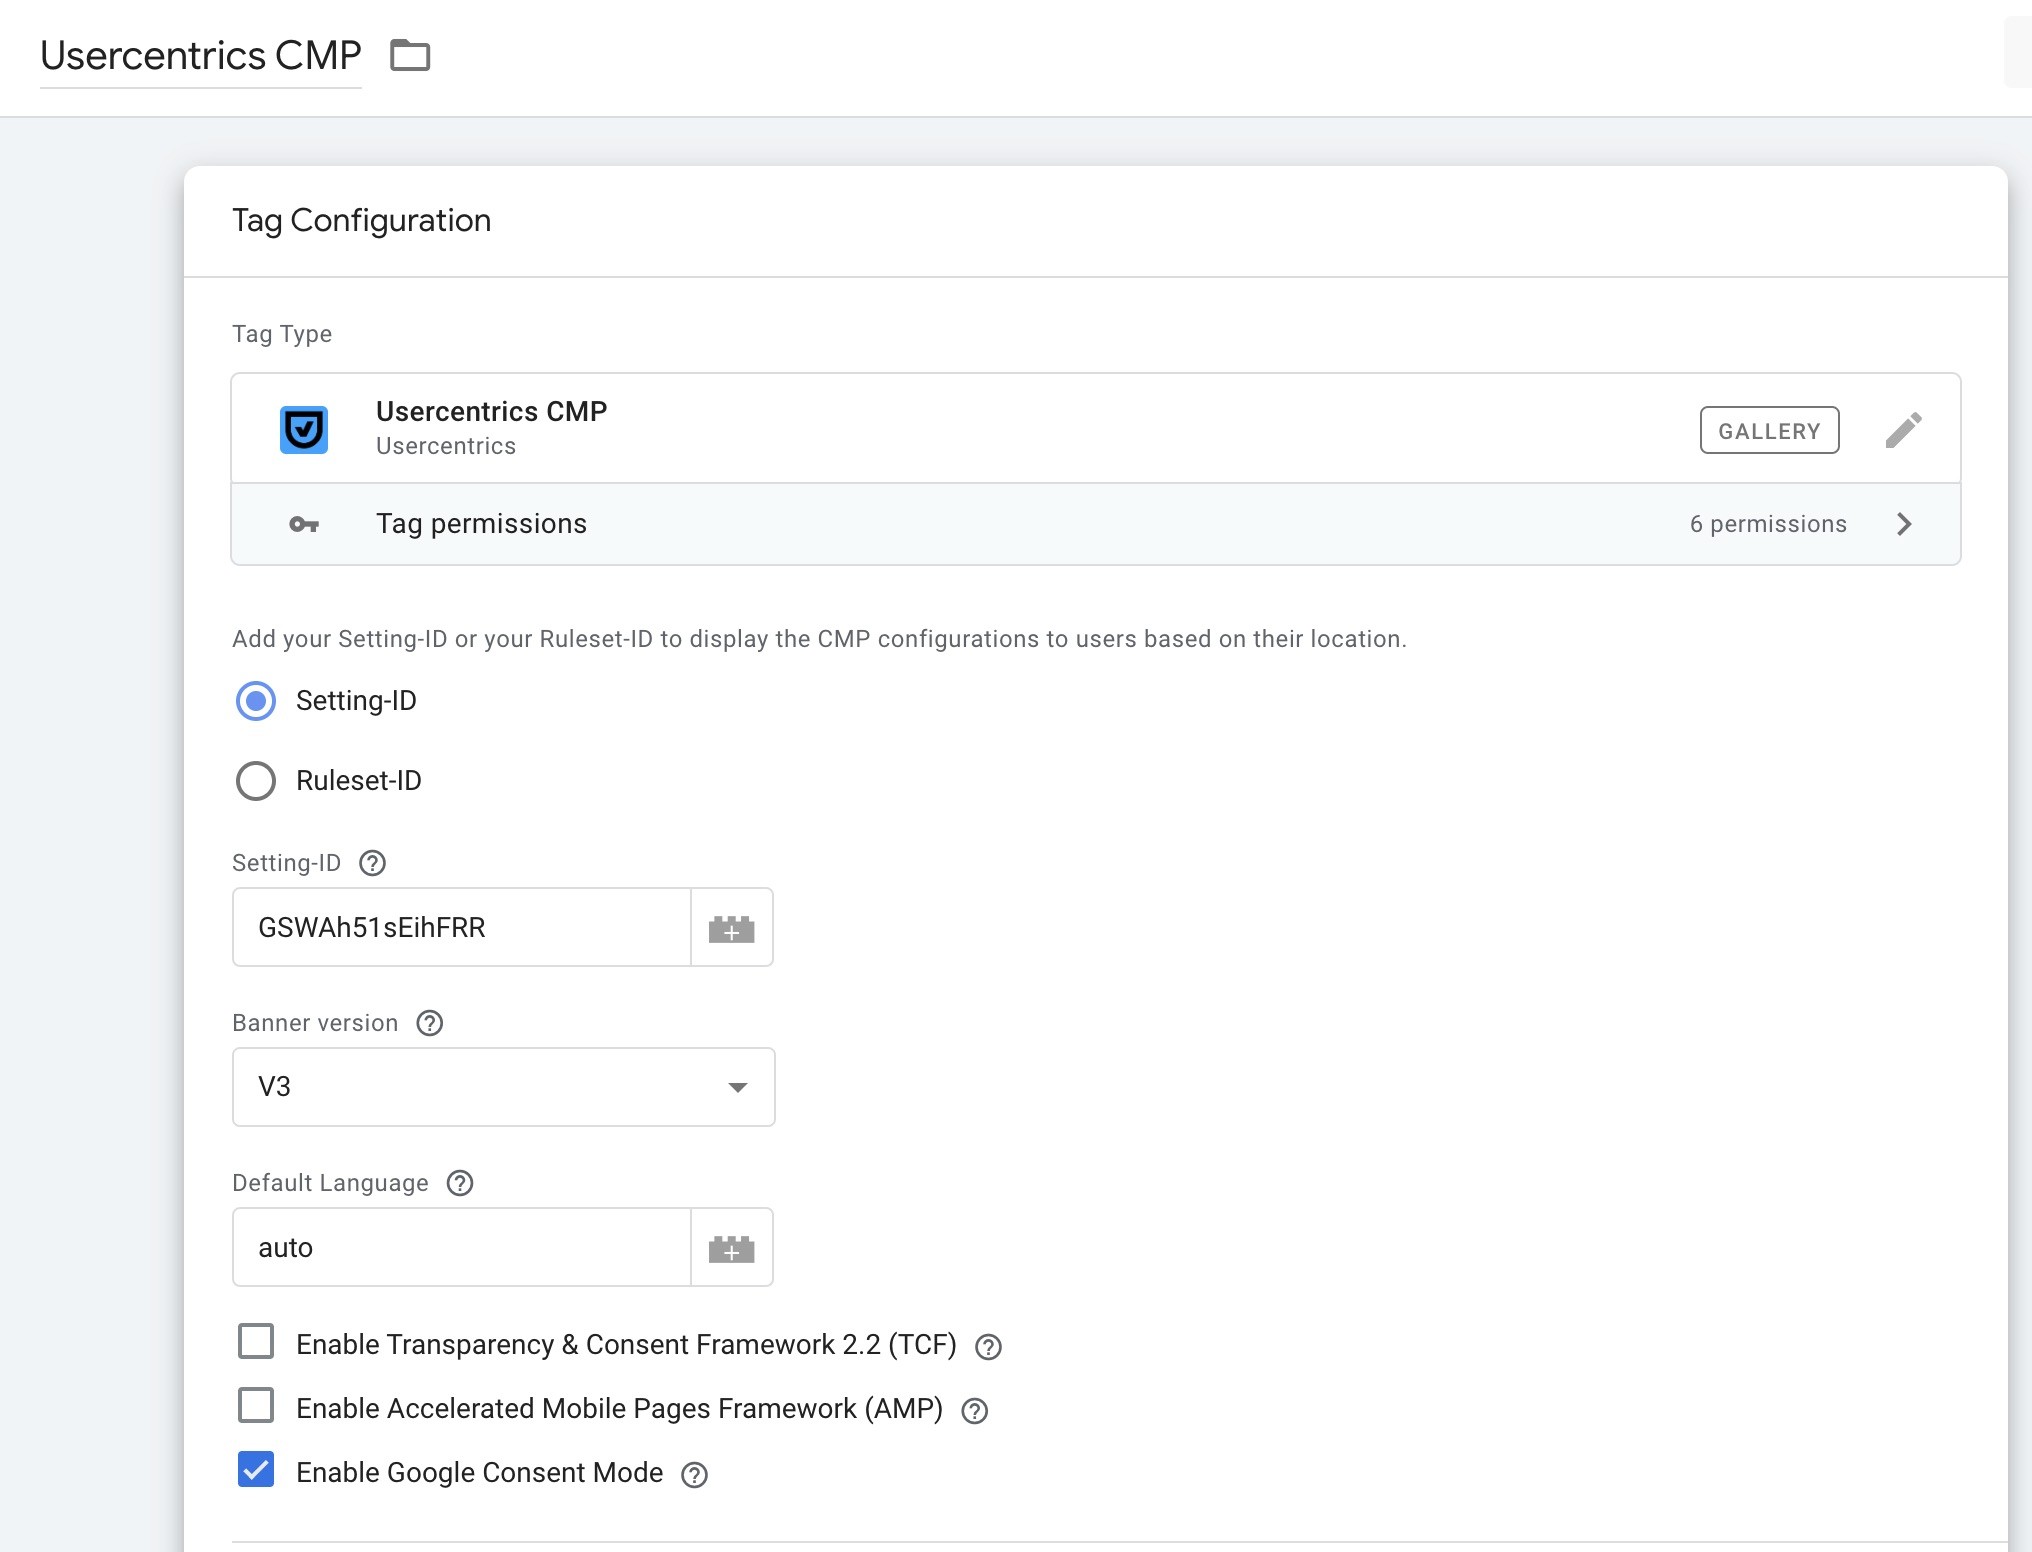
Step 4: Configure Your Usercentrics CMP Tag
To configure the CMP tag, you need your Setting-ID from Usercentrics:
Log into your Usercentrics account.
Navigate to "Implementation".
Copy your Setting-ID.
Go back to GTM and paste your Setting-ID into the respective field.
Additional configurations:
✔ Banner Version: Select Latest for the most updated settings.
✔ Default Language: Set to Auto for automatic language adaptation.
✔ Enable Google Consent Mode: Toggle ON to activate Google's Consent Mode.
Google Consent Mode ensures that analytics and ad tracking tags comply with user consent preferences.
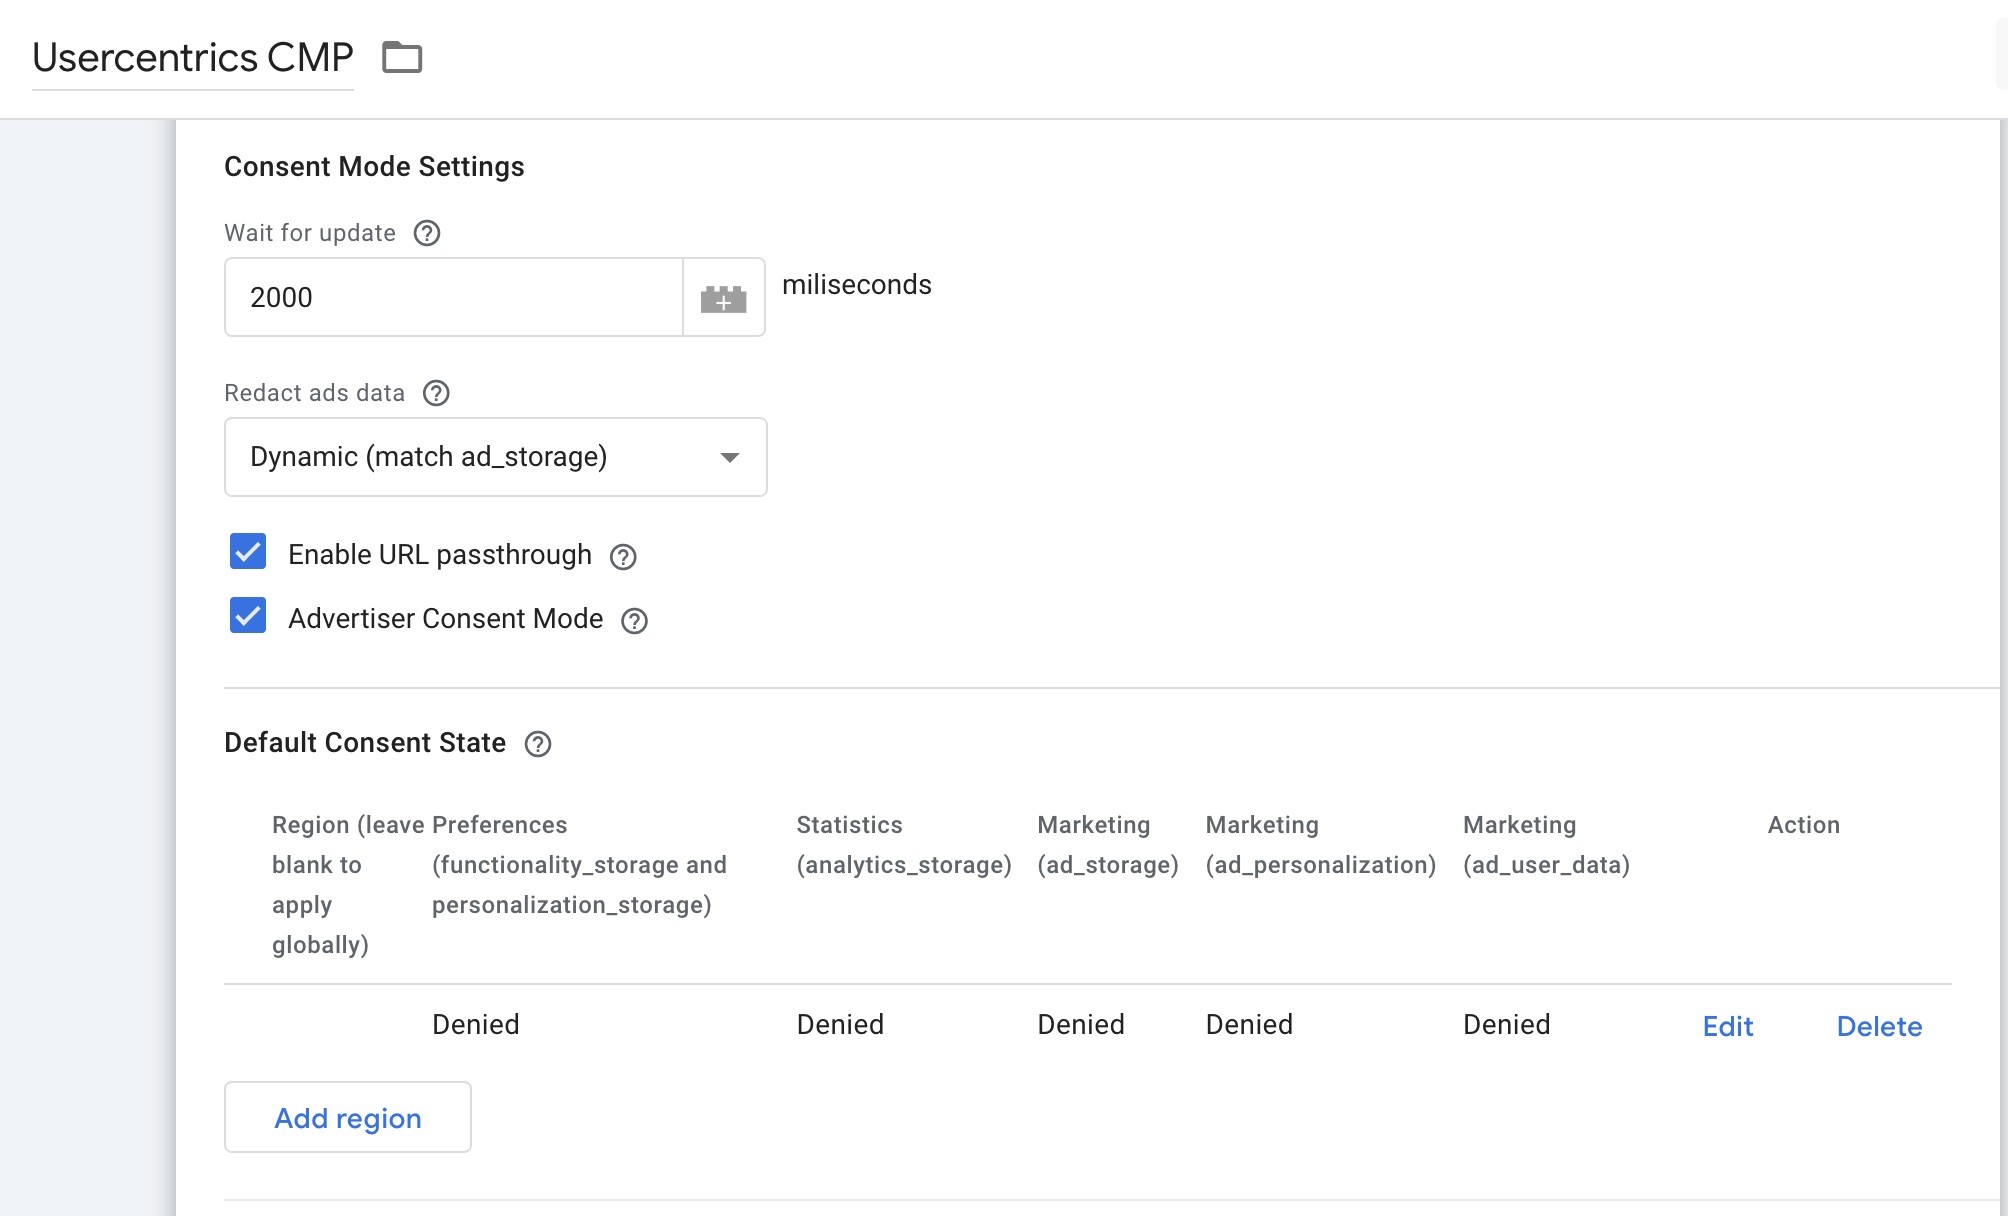
Step 5: Set Up Consent Mode Settings
Scroll to the Consent Mode Settings section.
For Default Consent State, leave the Region field blank unless regional customizations are required.
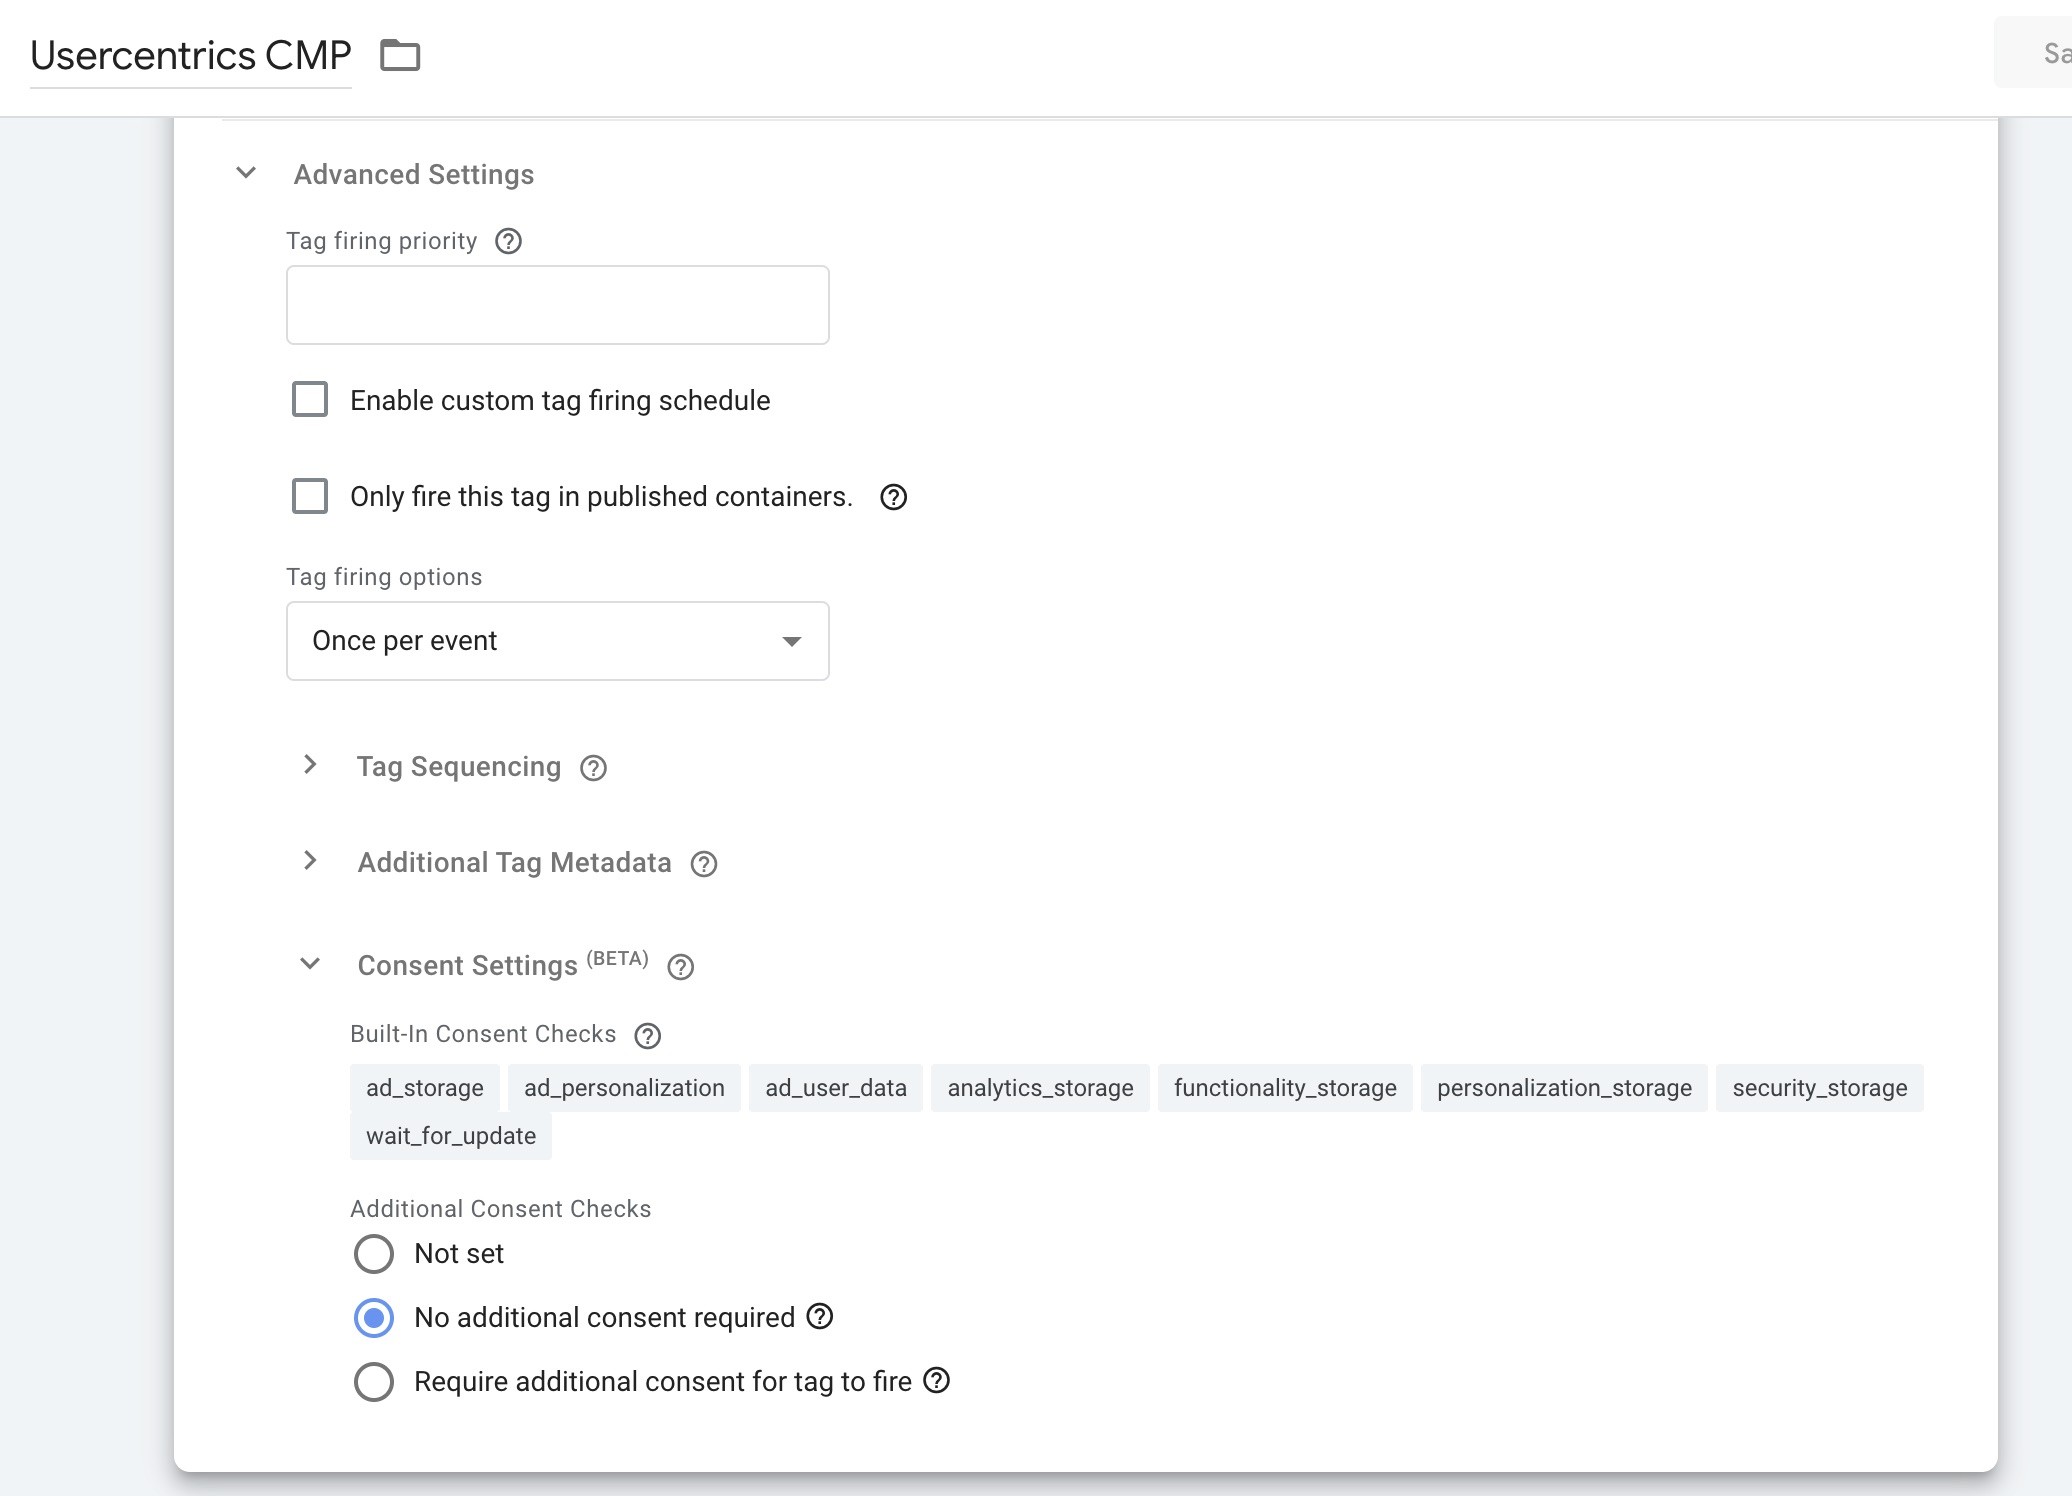
Step 6: Configure Advanced Settings
In the Advanced Settings section, select:
Tag firing options: Set to Once per event.
Consent settings: Select No additional consent required.
Ensuring tags fire correctly prevents data from being collected before user consent is granted.
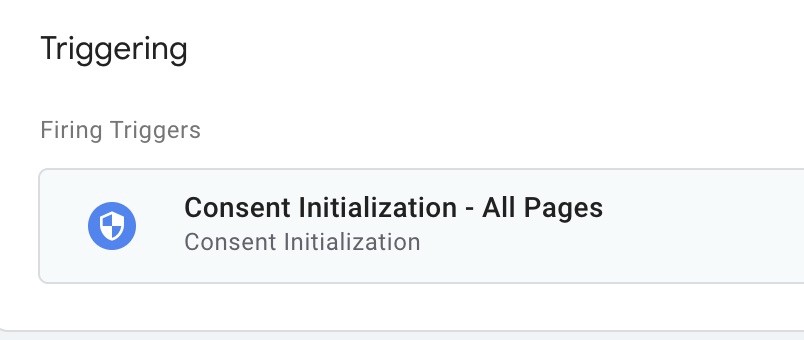
Step 7: Set Up the Consent Initialization Trigger
Under Triggering, click "Choose a trigger".
Select Consent Initialization (a built-in GTM trigger).
This ensures the CMP tag loads before any other tags on your website.
Step 8: Save & Test Your Configuration
Save Your Changes
Click "Save" to finalize your Usercentrics CMP tag configuration.
Preview Mode
Before publishing, test your configuration:
Click "Preview" in GTM.
Open your website in Google Tag Assistant.
Verify that the CMP loads correctly at the right moment.
Clear Browser Cache Before Testing
Windows: Press Ctrl + Shift + Delete.
Mac: Press Cmd + Shift + Delete.
Clearing browser data ensures your test reflects the latest changes.
Step 9: Enable Consent Overview in GTM
In GTM, go to Admin.
Navigate to Container Settings.
Enable the Consent Overview feature.

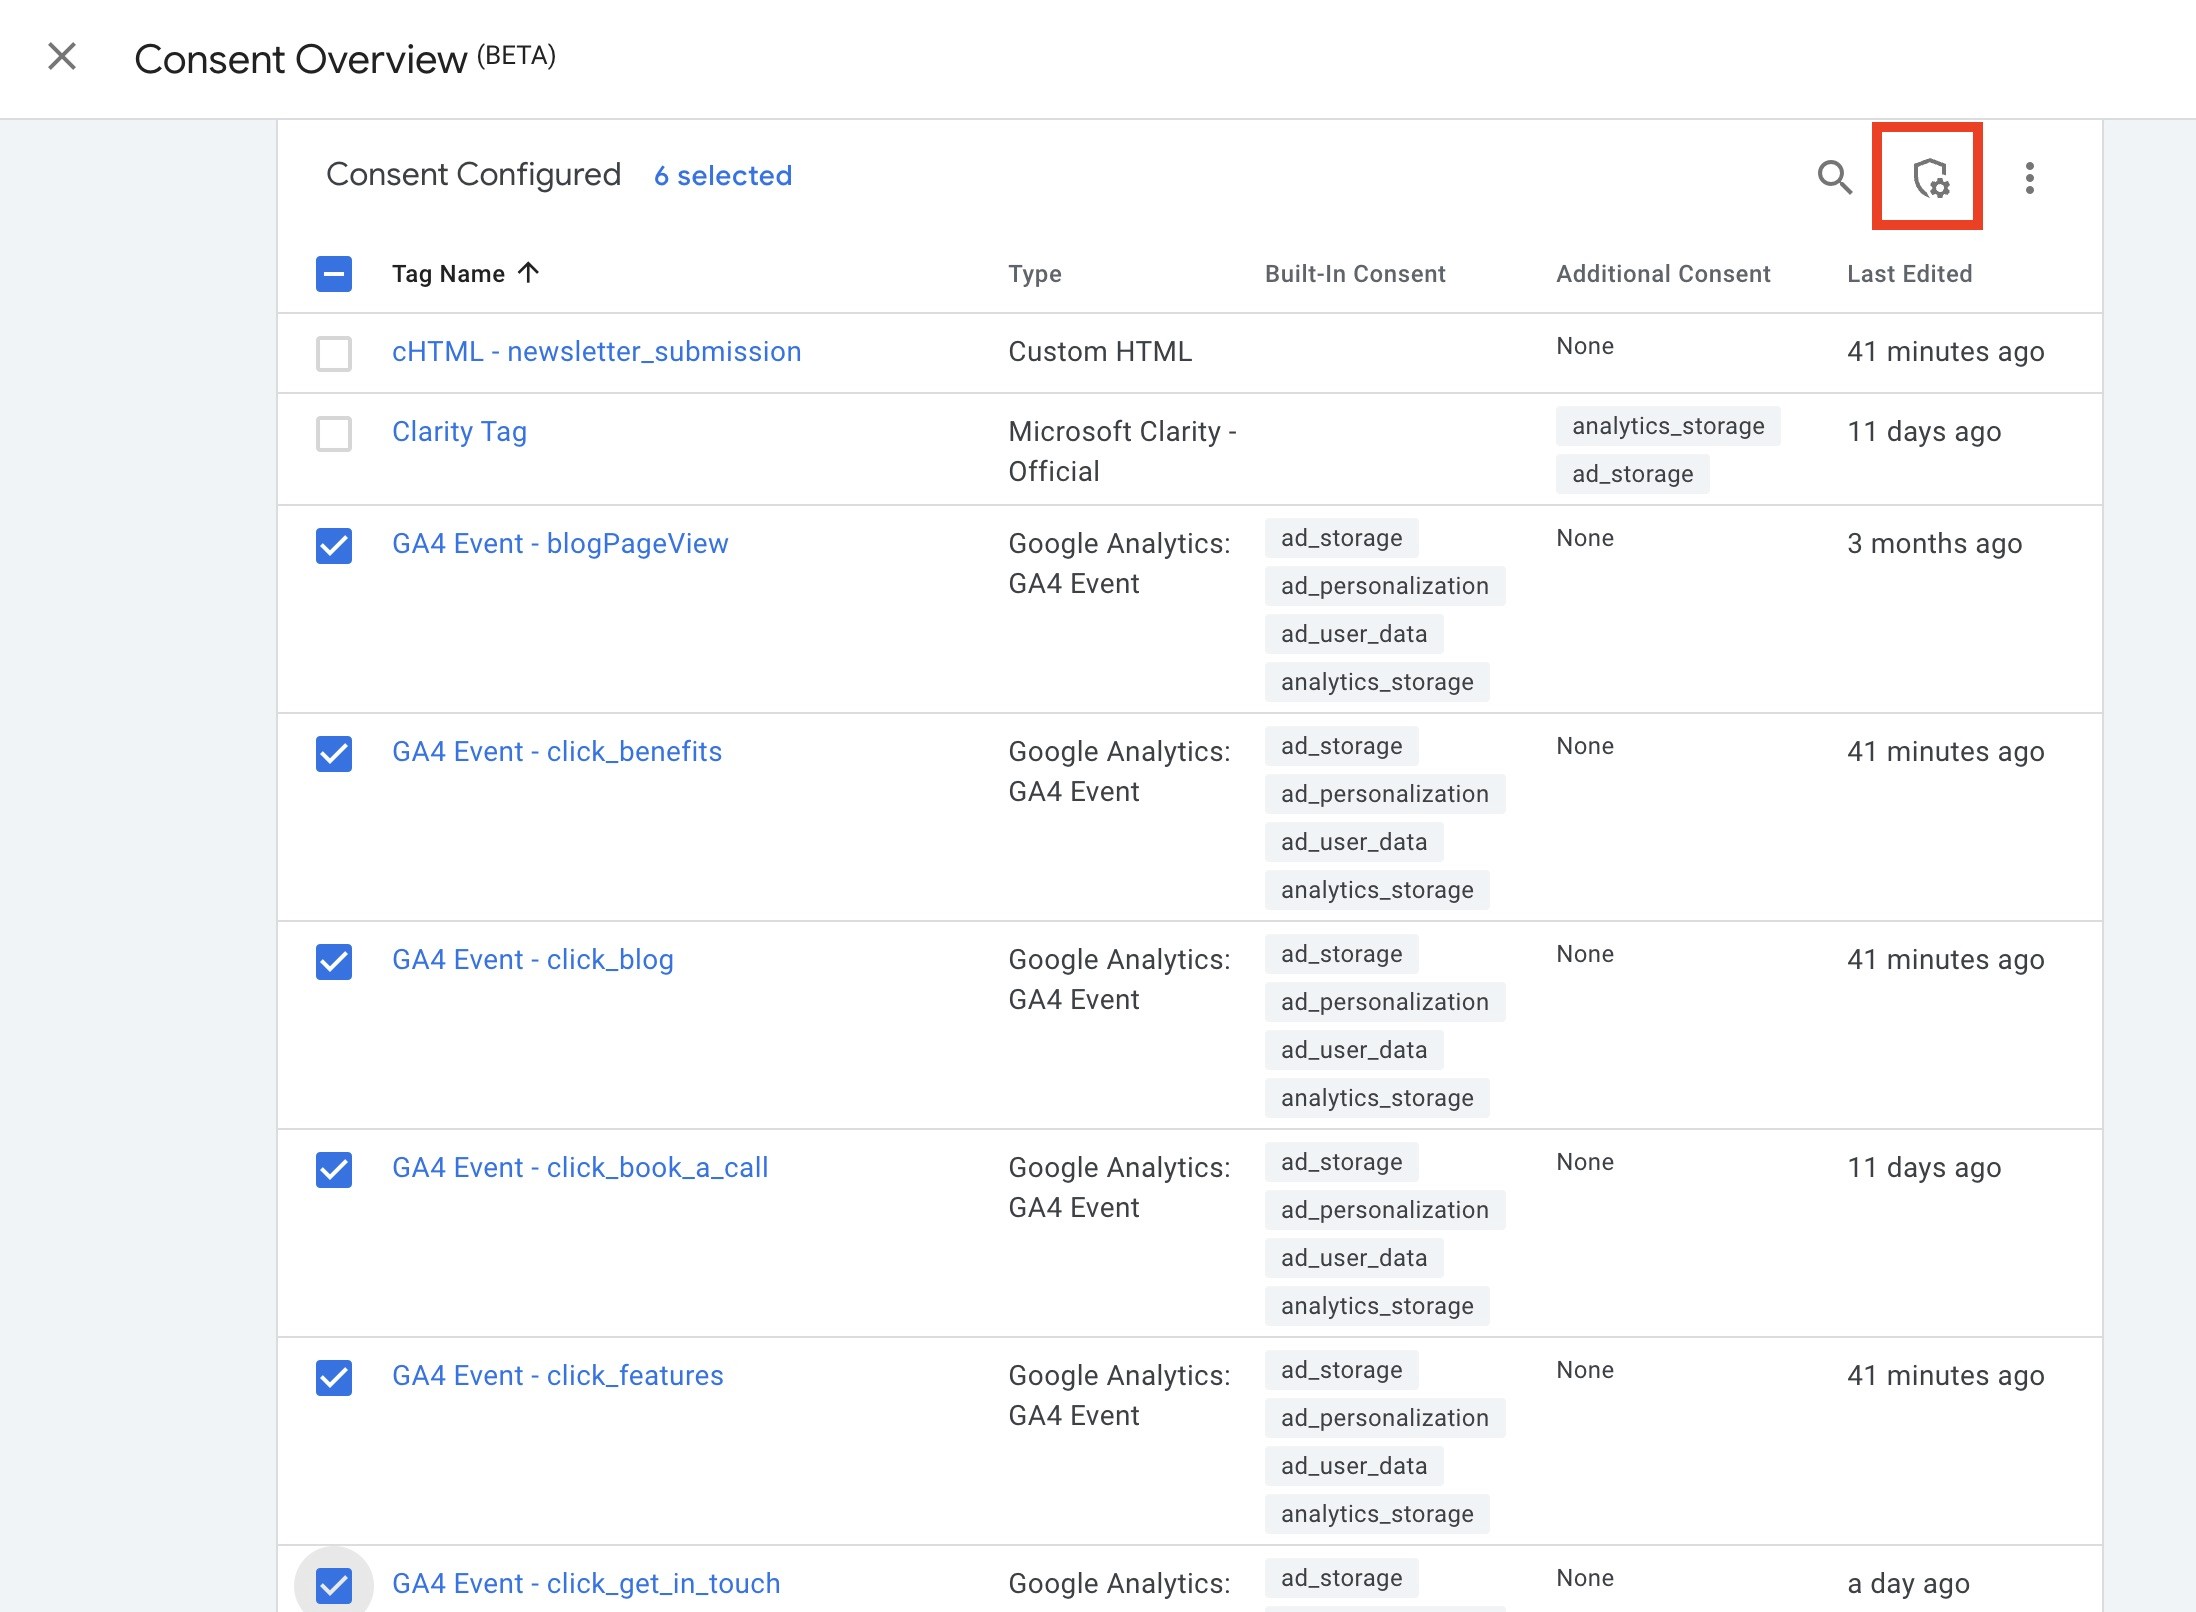
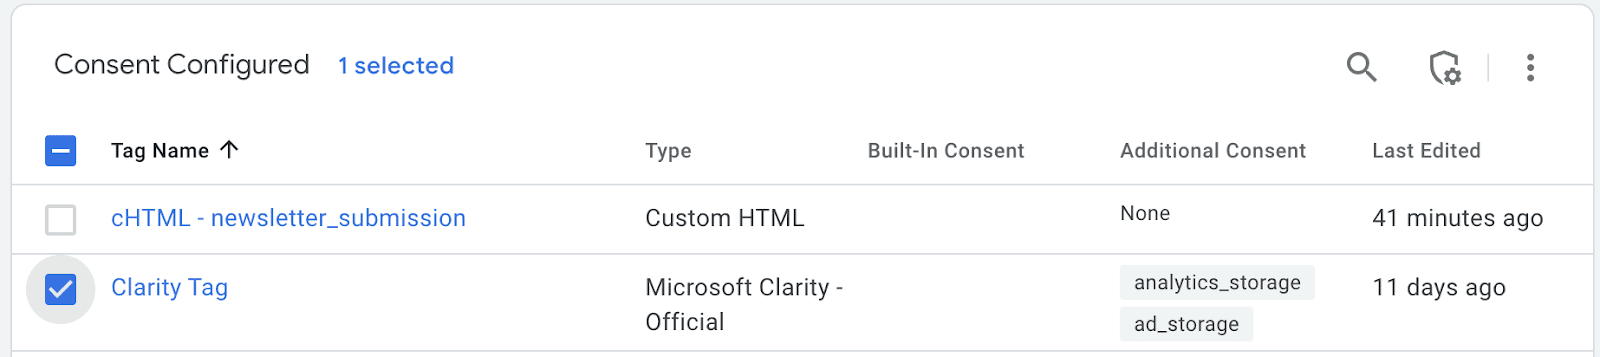
Step 10: Verify Consent Setup
Go back to "Tags" in GTM.
Check for the shield icon next to your tags.
Click the shield icon to view consent details for each tag.

Step 11: Configure Consent for Google Tags
Click on the shield icon for all Google-related tags.
Select "No additional consent required" for these tags.
Save changes.

Google Ads, Google Analytics, and other Google services follow Consent Mode settings automatically.
Step 12: Configure Consent for Non-Google Tags
Click on the shield icon for all non-Google tags.
Select "Require additional consent".
Enable consent settings for:
ad_storage (for advertising-related tracking).
analytics_storage (for tracking and analytics tools).
Save changes.
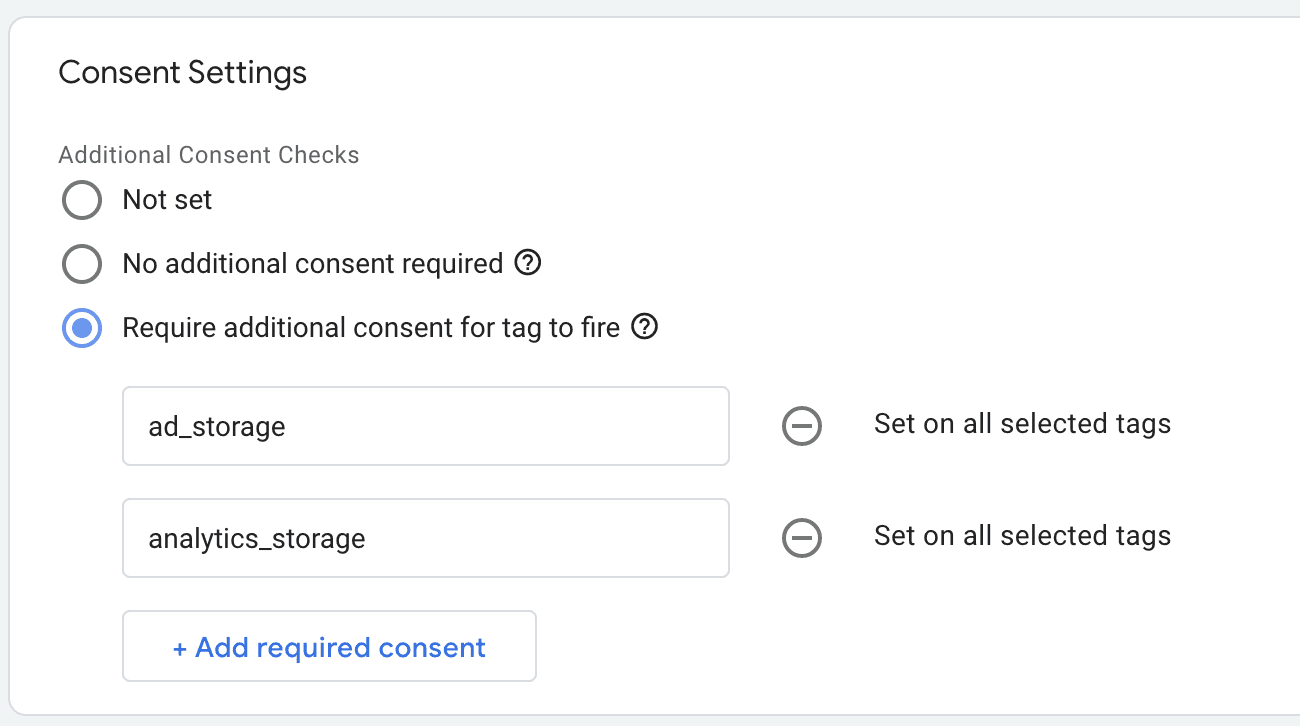
This step ensures that third-party tools only fire if user consent is granted.
Step 13: Creation of Custom Event
Next, modify the trigger for the tag. In this example, it’s a custom event consent_status.
When a user allows cookies, Usercentrics send a custom event consent_status. I will remove the existing "all pageviews" trigger and replace it with the custom event cookie_consent_update to trigger the Posthog and Clarity tags.
Step 14: Save and Test Again
Click "Save" in GTM.
Use Preview Mode to test that all changes apply correctly.
Check that all Google and non-Google tags fire only after user consent is granted.
Step 15: Final Verification and Publishing
Perform a final review in Google Tag Assistant.
Ensure that the Consent Initialization Trigger works properly.
Click "Submit" in GTM to publish the setup.
Step 16: How to Debug Google Consent Mode v2
Debugging Consent Mode v2 is an essential step in ensuring your setup is functioning correctly—particularly as regulations and platform policies continue to evolve. Here are two effective methods you can use to verify that your consent signals are being properly communicated:
1. Use Google Tag Manager’s Preview Mode
The most straightforward way to inspect consent states is through Google Tag Manager (GTM) Preview mode:
Open your container in GTM and click on "Preview" to enter debug mode.
Navigate through your website while the preview window is active.
Once loaded, click on the “Consent” tab within the preview panel.
Here you’ll see the real-time consent state (e.g., granted or denied) for each tag event.
You can use this view to verify that tags are firing—or being suppressed—based on the user’s consent choices. This method is ideal for marketers and analysts who want a visual, tag-by-tag confirmation of consent handling.
2. Inspect Network Requests in the Browser Console
For a deeper, more technical check, use your browser’s developer tools:
Open your website in Chrome (or another browser with dev tools).
Press Cmd+Option+I on Mac or Ctrl+Shift+I on Windows to open DevTools.
Go to the Network tab and filter by requests to GA4 (e.g., look for requests going to collect?v=2 or that include /g/collect).
Examine the query parameters in those requests. You should see:
gcs: The legacy consent signal parameter (Consent Mode v1)
gcd: The new parameter introduced in Consent Mode v2, which includes more detailed consent state information
The presence and values of these parameters will help you confirm that Consent Mode v2 is implemented and transmitting data properly.
Final Check: Ensuring Compliance & Performance
Congratulations! 🎉 You’ve successfully set up Usercentrics Consent Initialization in Google Tag Manager.
Ongoing Best Practices:
Regularly review your Consent Mode settings in GTM.
Keep your Usercentrics template updated.
Monitor Google Consent Mode reports in Google Analytics.
Frequently Asked Questions (FAQs)
1. Why is Usercentrics CMP important for GDPR compliance?
Usercentrics ensures that user consent preferences are properly managed, helping businesses comply with GDPR, CCPA, and other privacy laws.
2. What happens if I don’t enable Google Consent Mode?
Without Google Consent Mode, tracking tags may fire before consent is obtained, potentially violating privacy regulations.
3. How do I update my Usercentrics CMP settings?
Simply log into your Usercentrics dashboard, update the Implementation settings, and apply the new Setting-ID in GTM.
4. Can I customize the Usercentrics banner appearance?
Yes! You can modify banner styles within the Usercentrics settings to match your website’s design.
5. What should I do if my Usercentrics CMP tag isn’t firing?
Ensure Consent Initialization Trigger is set.
Check Preview Mode in GTM for errors.
Clear your browser cache and test again.
6. How does Google Tag Manager handle user consent?
GTM integrates with Usercentrics CMP to prevent Google Analytics, Google Ads, and other tracking scripts from firing until consent is granted.
Final Thoughts
Setting up Usercentrics Consent Initialization in Google Tag Manager is a crucial step toward maintaining privacy compliance and optimizing data tracking. By following this guide, you can ensure your website meets legal standards while maintaining user trust and data security.
For further assistance, visit the Usercentrics Help Center or consult the Google Tag Manager Documentation.
🚀 Now go ahead and implement your consent solution seamlessly!